

/ 3dimensional Design / Car Modelling
Although studying communication / information design, not later than after
coming in touch with the interface area in my last semesters I became convinced
that exploring threedimensional shapes is a must for an interface designer.
Since our common computer user interfaces make use of
real life metaphors such as the desktop, the folders and the controls I assume that
dealing with real world instances is required to design better UIs.
For this purpose of learning threedimensional modelling I bought Arndt von Koenigsmarck's Cinema 4D 10 workshop book. The book concentrates expecially on the application's modelling capabilities instead of trying to explain every one of the endless possibilities of the program. In the end of the book you'll have build yourself a pretty realistic car (depending on how acurate you have worked) and I suppose from that time on every object modelling should be an easy one for you.
Of course some cases remain a matter of experience. Especially boxmodelling that prevents triangular polygons refers to this aspect.
Glossary
-
Blueprint

A blueprint is a type of paper-based reproduction usually of a technical drawing, documenting an architecture or an engineering design. More generally, the term "blueprint" has come to be used to refer to any detailed plan.
Please read on further information at wikipedia.org
-
Global Illumination
Global illumination is a general name for a group of algorithms used in 3D computer graphics that are meant to add more realistic lighting to 3D scenes. Such algorithms take into account not only the light which comes directly from a light source (direct illumination), but also subsequent cases in which light rays from the same source are reflected by other surfaces in the scene (indirect illumination).
Please read on further information at wikipedia.org
-
Ambient Occlusion
Ambient occlusion is a shading method used in 3D computer graphics which helps add realism to local reflection models by taking into account attenuation of light due to occlusion. Ambient occlusion attempts to approximate the way light radiates in real life, especially off what are normally considered non-reflective surfaces, for example, in the way light through a small crack in the curtain in an otherwise darkened room can slightly illuminate the entire room, and not just the path of light passing through the crack itself.
Please read on further information at wikipedia.org or buy this "bible": "Lighting&Rendering" by Jeremy Birn
-
HDRI - High dynamic range imaging
In image processing, computer graphics, and photography, high dynamic range imaging (HDRI or just HDR) is a set of techniques that allows a greater dynamic range of luminances between light and dark areas of a scene than normal digital imaging techniques. The intention of HDRI is to accurately represent the wide range of intensity levels found in real scenes ranging from direct sunlight to shadows.
Please read on further information at wikipedia.org
-
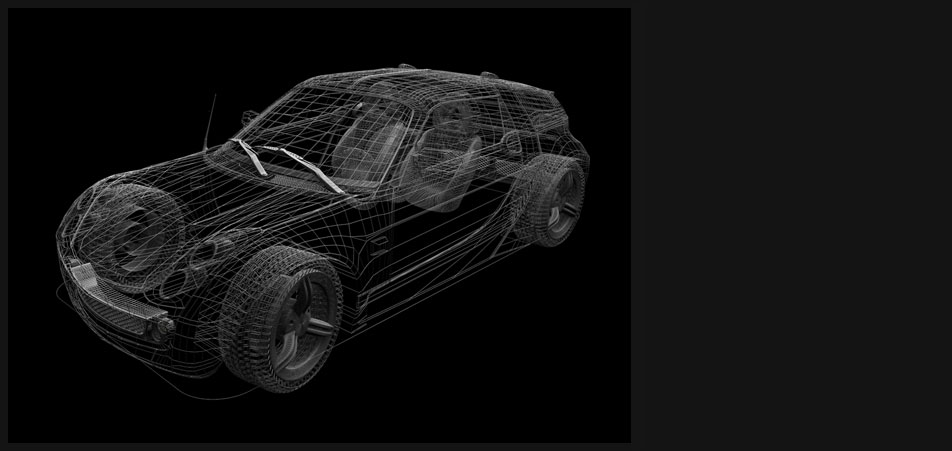
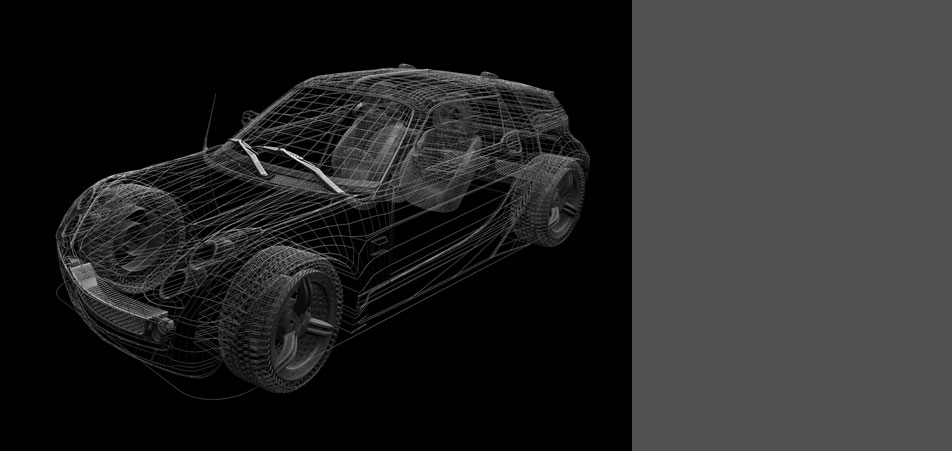
Modelling a «Smart»
Assuming that "car-modelling" might be one of the supreme disciplines of product modelling it was my goal to collect some profound knowledge about it. The secondary effect was the ease of handling the application's (Maxon's Cinema 4D) many different modelling tools.
-
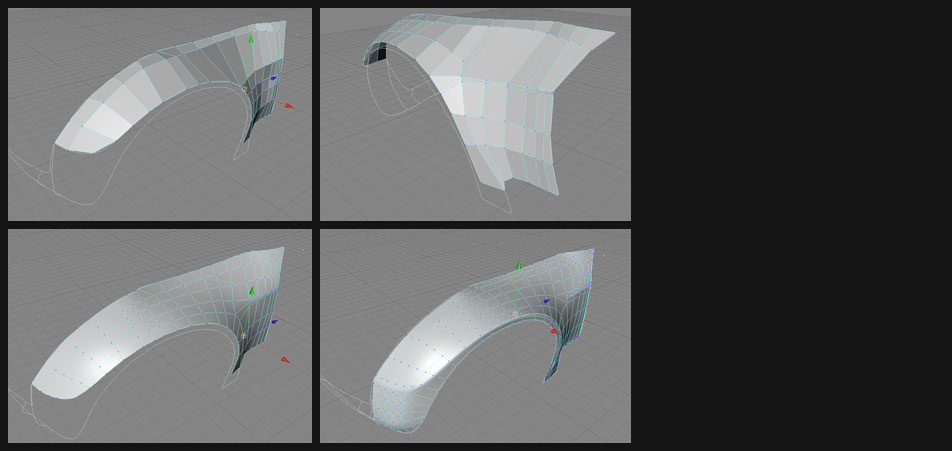
Car wing with the «poly-by-poly» method
After extracting splines from blueprints one start modelling single parts which will be concatenated afterwards. There are different approaches to reach the target. In this case I begin with a so called poly-by-poly method.
-
Single parts Concatenating
As for the symmetrical parts of an object you always build just the half of it and mirroring the complementary part. Now it's all about constructing the several parts and details of a car and you should come with some patience of course.
-
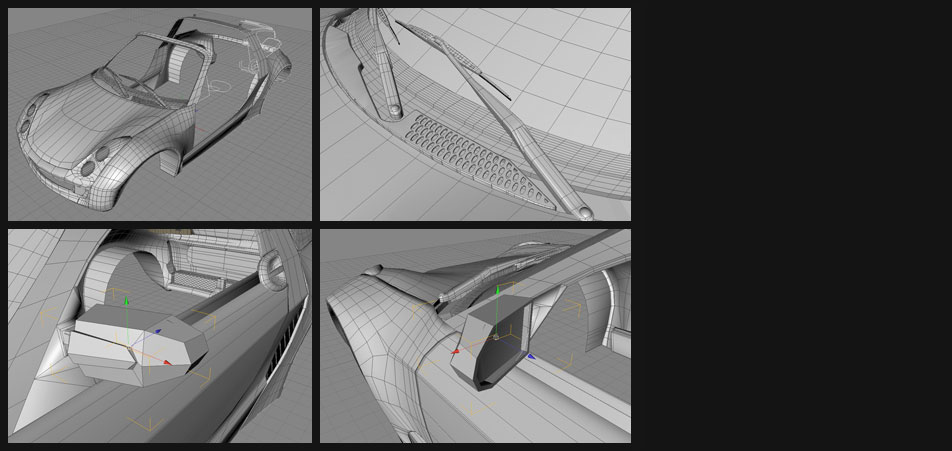
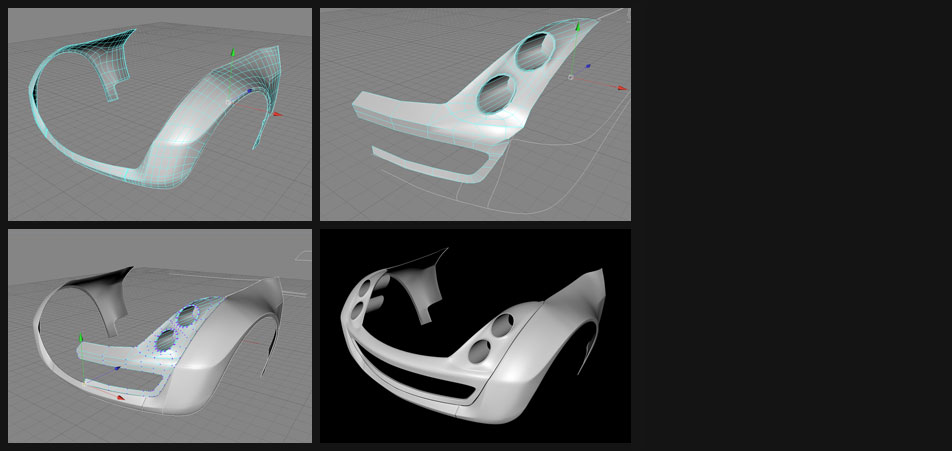
Single parts Details I
In order to keep the file size small you should care about reducing the number of polygons to a minimum. The edges will be smoothed later after putting them inside a HyperNurbs-Object.
-
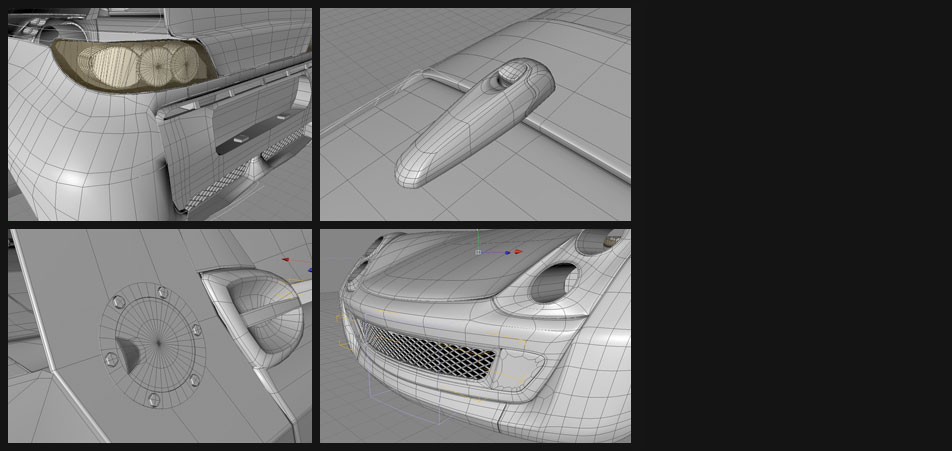
Single parts Details II
Some other details (from left to right / top to the bottom):
- tail lamp Some other details (from left to right / top to the bottom):
- hinge
- fuel door
- air entrance
-
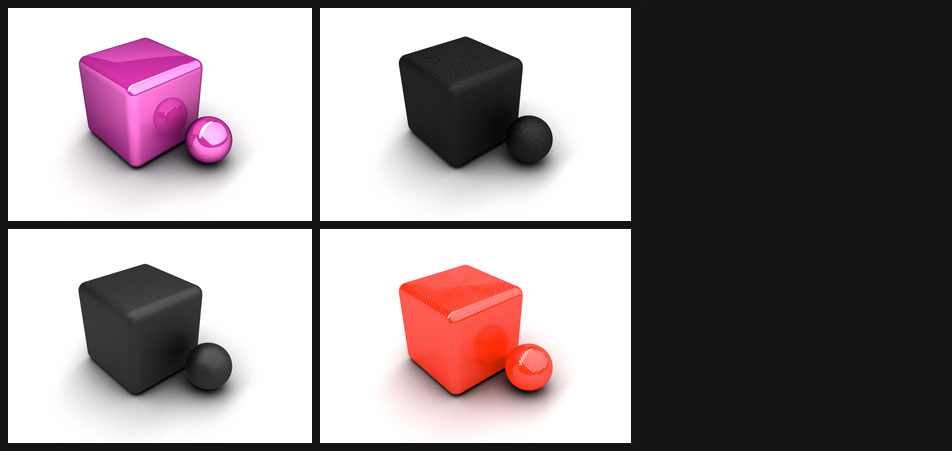
Materials
The next step was to find the adequate materials for the different parts of the car. Here you see the first lineup:
- paint for the car body panels
- material for the black, matte and poriferous parts
- material for the tyre rubber
- translucent glass for the brakelight
-
-
-

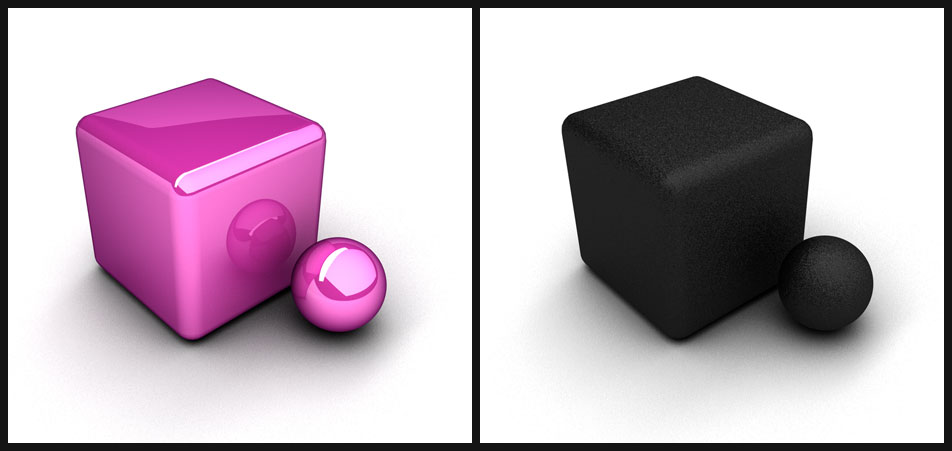
Materials II
The second linup of materials:
- turn light
- metal for the center pillar or rollbar
- metal for the alloy rim
- tail lamp's translucent white glass
-

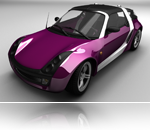
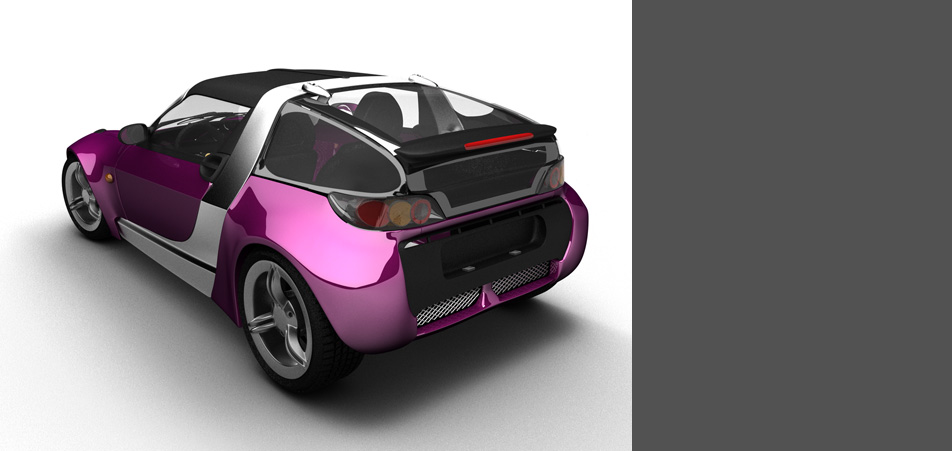
Car lighted with three lights I
In this rendering you can see the smart lighted with three lights: one ambient, one tilted from right above the car and one tilted from left above it. The lights are "area lights" and no "global illumination" was used. The floor has an "ambient occlusion" material.
The aim was to give the object a studio lighting atmosphere.
The render time was about six hours. (Sorry! I forgot to make a note of it, next time I will...)
-
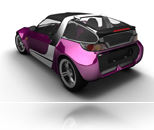
Car lighted with three lights II
Almost the same setup as in the frontal long shot with little adjustments to the car's paint material and the floor material.
-
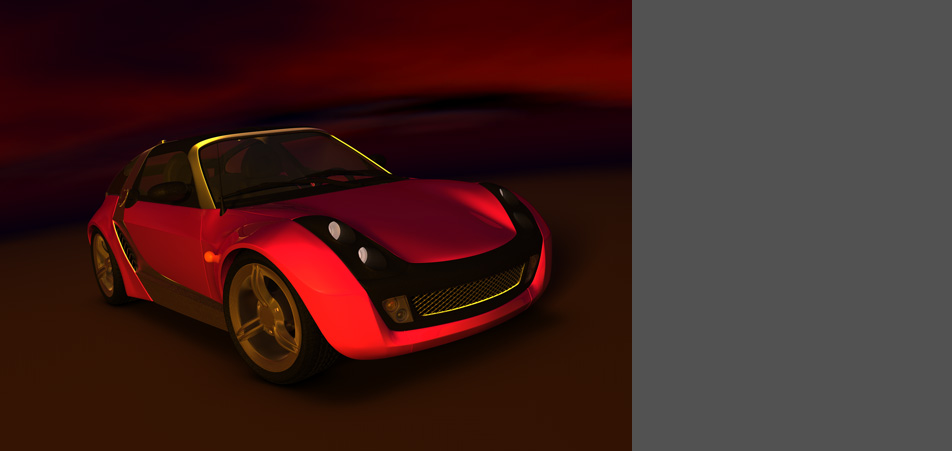
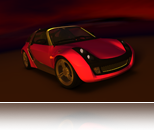
Car lighted with a HDRI + "area lights" combination
The HDRI material for the sphere on which it has been projected is generated with the app's "sky object". Since it produces a lot of diffuse light two additional lights have been applied to support some extra reflections.
The rather unreal environment is intended.
-
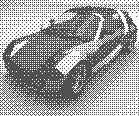
Modelling a car would be much easier now :)
This exercise has taught me a lot of things about modelling objects in 3D and if I would do it again I would do it much better, faster and what is the most important, much more accurately. Of course with the web resolution it is hard to see the many bugs there and I don't show real closeups... :) Stay tuned, next time there shall come another car project like this.
| 3dimensional | Project modelling and lighting a car |
Metadata | |||||||||
|---|---|---|---|---|---|---|---|---|---|---|---|
| Date | 2008 | ||||||||||
| Size | 40kb | ||||||||||
Content car modelling: investigation / approaches / visualization / conclusion |
 |
Duration | 2 weeks | ||||||||
| Media | digital | ||||||||||
| Applications used | |||||||||||
| Dreamweaver | Photoshop | ||||||||||
| Illustrator | Indesign | ||||||||||
| BBEdit | Firebug | ||||||||||
| contact me! | H | ||||||
|---|---|---|---|---|---|---|---|
| H | |||||||
| H | |||||||
| Address | |||||||
| Name | Klaudiusz Szatanik | ||||||
| Street | Ulmer Strasse 48 | ||||||
| City | 73066 Uhingen | ||||||
| Fon | 0173 3030301 | ||||||
| racl@klaudiusz.de | |||||||